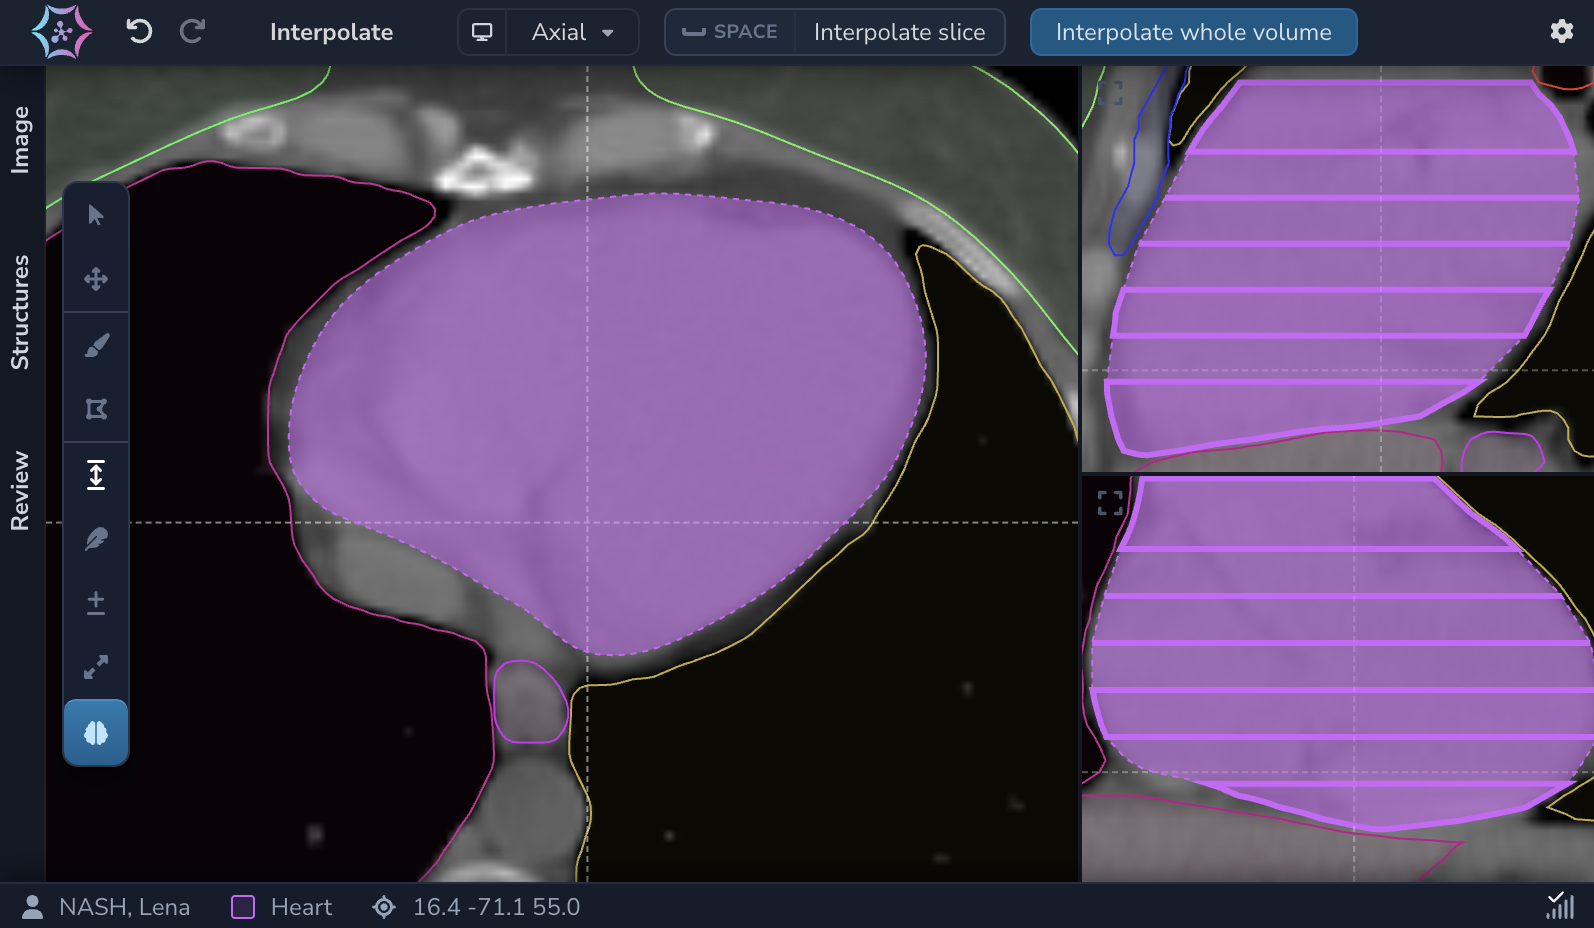
Interpolate tool
In order to save time and reduce the manual workload of delineating large structures you may contour every 2, 3, k slices and use the Interpolate tool to fill in the gaps.

- Select the structure that you want to Interpolate from the Structures tab.
- Select the appropriate viewport (Axial, Sagittal, Coronal) for connecting the contoured slices.
- Assess the preview of the interpolated slices.
- Interpolate by clicking on the Interpolate/Extrapolate slice button on each interpolated preview slice or the Interpolate whole volume button, to interpolate whole volume.
Choosing a viewport
The Interpolate tool can work on any of the three (Axial, Sagittal, Coronal) viewports. Usually interpolation will be done on the Axial viewport, which is the default. However, you may change the viewport by clicking the dropdown and selecting a different axis.
Interpolation preview

The Interpolate tool shows a preview for the resulting contour. Make sure to assess that the preview is correct before committing to applying the interpolation.
The interpolation preview might reveal undesirable results on some slices. It is important to understand that the tool interpolates empty slices, using the two closest non-empty slices as reference. Make sure that all empty slices are actually empty (e.g. by erasing them using a brush with a large Diameter value).
Extrapolation mode

Once you reach the uppermost/lowermost slice of your structure, you may extend the volume superiorly/inferiorly using the Extrapolate slice mode in the top bar tab. You may use this tool either by clicking on the Extrapolate slice button or by pressing the Space key per each interpolated preview slice.